
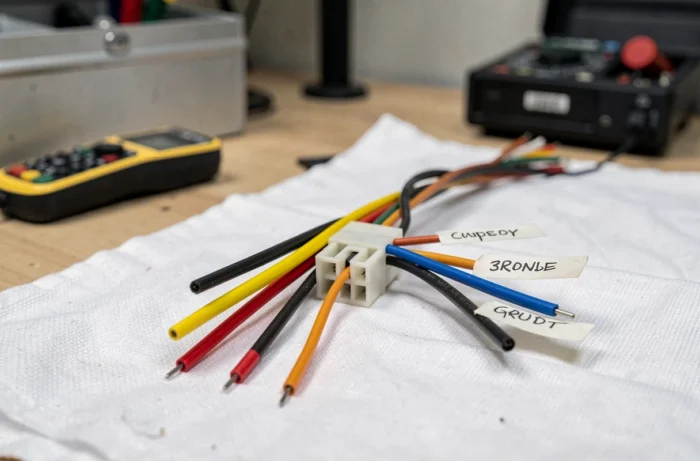
A bundle of wires emerges from the dashboard, each strand a different color, and none of them labeled. Connecting a car stereo then becomes a matter of decoding an electrical language in which each color corresponds to a specific function. Knowing what each car stereo wire color means helps prevent short circuits, speaker crackling and the loss of your favorite radio stations.
Yellow, red and black wires: the trio that powers your car stereo
Before touching any connector, identify the three wires that handle the power supply. They form the foundation of any installation.
The yellow wire provides constant power. It remains live even when the engine is off, preserving your settings, radio stations and clock.
The red wire, on the other hand, only carries current when the ignition is on. It prevents the car stereo from running with the engine off and protects the battery from slowly draining.
The black wire is the ground, providing a return path to the battery’s negative terminal. Without a good ground connection, the car stereo may crackle, switch off randomly or fail to start. Secure the black wire to a bare metal point on the chassis, not to a painted or rusty screw.
Have you ever noticed that after changing the battery, your car stereo asks for a security code? That’s because the yellow wire was disconnected from its constant power supply. The memory is erased and the security system is activated.
To find a car stereo wiring diagram with wire colors suited to your setup, always compare the stereo’s wiring diagram with the vehicle’s.

Speaker wire colors: polarity and position in the vehicle
Audio wires follow a paired pattern. Each speaker uses two wires: a positive (signal) and a negative (return). Reversing the polarity won’t damage anything, but it will reduce sound quality because the speaker cones move in opposite directions.
Identify each speaker by its wire color
- White and white/black: front left speaker. The solid white wire is positive; the wire with the black stripe is negative.
- Gray and gray/black: front right speaker. The same pattern applies: solid wire for positive, black stripe for negative.
- Green and green/black: rear left speaker.
- Purple and purple/black: rear right speaker.
The rule is consistent: the solid-color wire is always positive, and the black stripe indicates negative. This convention applies to the vast majority of car stereos on the market, whether single-DIN or double-DIN.
Why does polarity matter so much? When one speaker pushes its cone outward while another pulls inward at the same frequency, the bass cancels out. The sound becomes hollow and flat, especially at moderate volume.
Orange and blue wires and their variations: often-overlooked auxiliary functions
In addition to power and audio, several wires handle functions that many DIYers overlook or leave unconnected.
Orange wire: dashboard illumination
The orange wire (sometimes orange/white) connects the car stereo to the vehicle’s lighting circuit. When you turn on the low beams, the stereo display switches to night mode and dims. Without this connection, the screen may be too bright at night or too dim during the day.
Blue wire: antenna and amplifier
The blue wire powers the electric antenna or sends a turn-on signal to an external amplifier. Connecting the blue wire to a constant power output could leave the antenna extended when the engine is off, wearing out the antenna’s electric motor on older models.
A blue wire with a white stripe is often used to control a separate amplifier. Don’t confuse it with the solid blue wire, which is reserved for the antenna.
ISO connector or direct wiring: adapting the connection to your vehicle
Most modern car stereos use a standardized ISO connector divided into two blocks. Block A contains the power wires (yellow, red, black, orange and blue). Block B contains the eight speaker wires.
If your vehicle has a factory ISO connector, installation is as simple as plugging it in. The challenge arises when the vehicle uses a proprietary connector. In that case, an adapter (sometimes called a “wiring harness adapter”) connects the two formats without cutting any wires.
Vehicles with a CAN bus interface
In some modern cars (particularly Volkswagen, Skoda and Seat models), the ignition, lighting and steering wheel control signals are no longer carried by conventional wires. This information travels over a digital CAN bus network. Matching wires by color alone is therefore not enough to retain all the factory functions.
A CAN bus interface module designed for the vehicle translates digital signals into analog signals that the car stereo can understand. Without this module, some functions won’t work.
The most common wiring mistakes
Swapping the yellow and red wires is the most common mistake. The car stereo turns on and everything seems normal, but as soon as you switch off the ignition, your settings and saved stations disappear. You have to set everything up again when you restart the car.
A loose ground wire can cause audible interference in the form of a high-pitched whine that changes with engine speed. This noise comes from the ground loop created between the alternator and the car stereo.
- Make sure the ground point is scraped down to bare metal, with no paint or rustproofing.
- Never connect two power wires together to “simplify” the wiring.
- Disconnecting the battery before working protects the components, but may reset some control units and trigger a car stereo security code.
Write down your car stereo’s security code before disconnecting the battery. Without it, the unit will remain locked after the battery is reconnected.
Car stereo wiring follows a color code that is consistent across manufacturers, but the vehicle itself can still hold surprises. Always comparing the stereo’s wiring diagram with the vehicle’s is the best way to avoid turning a simple job into an afternoon of troubleshooting.